7 Proven B2B SaaS Onboarding Emails That Increase Retention

Founder, Grow Predictably · 15+ yrs building B2B revenue systems
B2B SaaS onboarding emails that increase retention work by delivering quick wins at the right moment—80% of SMBs consider email the most effective tool for customer retention, and with an average ROI of $36 for every dollar spent, it’s the highest-leverage channel you have post-signup.
Most SaaS teams know onboarding emails matter. Few know exactly which ones to send, when to send them, and what to say.
I’ve seen the difference a single well-timed email makes. Not a flashy campaign or a complex automation sequence—just the right message hitting someone’s inbox exactly when they’re deciding whether your product is worth their time.
Here’s the reality: your new users aren’t churning because your product isn’t good enough. They’re churning because they never got to the moment where it clicked. The right onboarding email sequence bridges that gap—guiding them from signup to their first win before doubt sets in.
I’m going to walk you through seven B2B SaaS onboarding emails that actually move the retention needle, including the exact templates you can swipe and deploy today. Let’s get into it!
TL;DR: B2B SaaS onboarding emails that increase retention are structured email sequences that guide new users from sign-up to their first meaningful win, reinforce the value they were promised, and keep them engaged long enough to form lasting product habits.
Understanding User Intent and Needs Using 2 Tools
Decoding what your users intend to achieve and what they need to achieve those desired results is half the formula for making loyal customers and long-term business growth.
However, to make loyal customers, you must first ensure you don’t lose them along the way; this is what 70% of brands struggle with. (Source)
But don’t worry, we’ll tackle that through the power of targeted emails.
I’ve spent years helping companies fix this exact problem, and it usually comes down to one thing: they don’t really know their users.
Let me show you how to fix that using two practical tools: the Customer Avatar Canvas and the Customer Value Journey—critical tools for marketing and busines growth.
Customer Avatar Canvas
First up, the Customer Avatar Canvas.
The Customer Avatar Canvas is a document that helps businesses create a detailed profile of their ideal customer by considering factors like demographics, behaviors, and needs.
This profile allows companies to tailor marketing strategies and highlight key features of their product offerings to better resonate with their target audience.
A unique aspect is the “Before/After” step, which highlights how the product or service transforms the customer’s experience.
Think of it as a cheat sheet for understanding exactly who you’re talking to, which is an invaluable step for designing targeted onboarding emails.
Here’s what you need to nail down:
Demographics (the basics)
- Job title and level
- Company size
- Industry
- Age range
- Location
But here’s where most people mess up – they stop there.
The real gold is in understanding the following:
- Frustrations – What keeps them up at night, daily work headaches, technical limitations, budget constraints
- Goals – Career objectives, productivity targets, team management goals, revenue targets
- Values – What they care about most, their communication style, decision-making process, risk tolerance
Here’s an example: Let’s say you’re selling project management software.
When you use a Customer Avatar Canvas to break down who your typical target user is, you might come down to Mark, a 35-year-old marketing director at a mid-sized tech company who’s drowning in spreadsheets and losing track of deadlines.
Mark needs to prove ROI to his boss but can’t get good data from his current tools.
Now, what will this avatar breakdown entail?
Customer Value Journey (CVJ)
Let’s connect this to the broader customer journey using the Customer Value Journey (CVJ).
Why is the CVJ relevant in boosting your customer retention through onboarding emails?
The Customer Value Journey is a digital marketing framework that outlines the steps a customer takes, from first learning about a brand to becoming a loyal advocate.
It emphasizes building deeper connections at each of the eight stages of the CVJ—like awareness, engagement, and advocacy—through personalized and value-driven interactions and offerings.
Unlike a traditional sales funnel, CVJ nurtures long-term relationships as part of the customer journey and creates continuous value.
Here’s a simple glimpse of how the CVJ’s stages can guide your email marketing sequences.
Using the Customer Value Journey (CVJ) for onboarding emails:
- Awareness to Engagement: The first email welcomes the customer warmly, introduces your brand’s mission, and shares a quick-start guide or key feature overview.
- Engagement to Subscription: Follow up with an email offering a tutorial or resource that helps them get immediate value, like a “How to get started” video or a tip to solve a common problem.
- Excitement to Ascension: Send a personalized email highlighting advanced features, case studies, or exclusive benefits to encourage deeper product use or an upgrade.
- Advocacy: End the series with an invitation to join a community, provide feedback, or refer friends, rewarding them with a discount or incentive.
This approach gradually builds trust, demonstrates value, and strengthens the customer onboarding process at each step.
The “Excite” stage is where users usually discover more value from your offerings, prompting them to stay and explore your brand more.
But you can’t get there without knowing your avatar inside and out; that’s why, in this context, the Customer Avatar Canvas is a significant tool that must come hand in hand with the CVJ.
Putting the 2 Into Action
Now, here’s an effective approach to using your customer avatars and the customer value journey as tools for creating well-optimized, targeted onboarding emails that are sure to hook the right users at the right stage of their buyer’s journey.
- Start with the Customer Avatar: Identify your B2B customer’s specific pain points, goals, and decision-making process to create impactful onboarding emails. For example, if the avatar is a “Tech Manager,” focus on efficiency and ROI in your messaging.
- Apply CVJ Stages to Email Content:
- Awareness to Engagement: Send a welcome email introducing how your product solves its key problem (e.g., “Save 20% on IT costs with our tool”).
- Engagement to Subscription: Share a case study or guide tailored to their role, emphasizing practical, actionable benefits.
- Excitement to Ascension: Provide advanced tips, integrations, or features specific to their business needs, showing the potential for even greater value.
- Advocacy: End the series with an email encouraging them to share their success (e.g., testimonials, referrals) and offer an incentive.
- Make It Personal: Use the avatar details to customize subject lines, tone, and content, ensuring relevance at each CVJ stage. For instance, highlight how your solution impacts their specific industry.
This combined approach ensures the emails resonate with the customer’s priorities while strengthening the customer onboarding process and guiding them through their customer journey to loyalty.
And always remember to:
- Build separate avatars for each major user type
- Map their specific challenges to your features
- Create email segments based on user behavior
- Test different messages with each segment to optimize your onboarding email strategy
But enough about understanding your users – in the next section, we’ll look at the exact emails that’ll keep them coming back for more.
The 7 Proven Email Types That Drive Retention
Ever notice how some companies just nail their emails while others make you hit “unsubscribe” faster than a cat chasing a laser pointer?
Here’s the thing – emails are still crushing it for onboarding.
Let’s break down the seven types of emails that actually work (and I’ll show you exactly how to use them).
1. Welcome Email
A welcome email is the first message a business sends to new users or subscribers after they sign up.
It sets the tone for the relationship and gives a positive first impression.
The purpose is to introduce your brand, share helpful resources, and guide users on what to do next, like exploring products or services.
It’s also a chance to show appreciation, boost user engagement, and build trust.
A well-crafted welcome email can increase engagement, encourage loyalty, and make users feel valued right from the start.
This is your first date with users – don’t mess it up.
A great start begins with well-crafted welcome emails.
Keep it short and friendly.
QUICK TIPS:
- Quick thank you (1-2 sentences max)
- One clear next step (like “Click here to create your first project”)
- Link to a 2-minute getting started video
- Support contact info
- Keep your welcome emails clean with plenty of white space. Use one or two brand colors and a single image if needed
- Stick to under 200 words. This keeps it skimmable and easy to read
- Friendly but professional. Make it sound human, not robotic
For welcome emails that are short and compact, let’s take a look at Slack’s example.
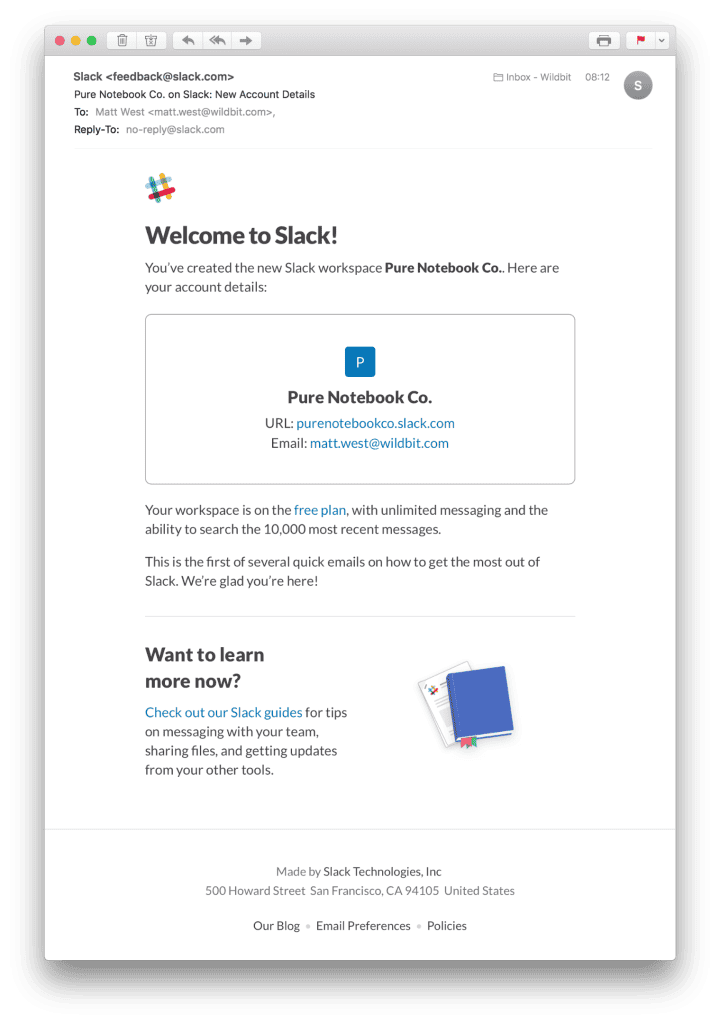
Slack’s example is quick.
It welcomes the user, gives them a quick breakdown of what to primarily expect for their accounts, and prompts them regarding the upcoming mail sequences that typically come after a welcome email.
Short and value-driven indeed.
To get started with your own welcome email, try using or adding to this template below.
Subject Line: Welcome to AllSign, Jeremy – Let’s Get Started!
Hi Jeremy,
We’re thrilled to welcome you to AllSign! You’ve just taken the first step toward simplifying how you manage contracts and agreements.
With AllSign, you can automate contract workflows, stay organized, and never lose track of important deadlines. Our mission is to help your business save time, reduce errors, and stay on top of every deal.
Ready to dive in?
Click below to set up your account in just a few minutes:
👉 [Get Started Now]
Need help? We’ve got you covered. Just reply to this email or check out our Help Center.
Here’s to streamlined success,
The AllSign Team
[Your Name]
[Your Title]
To create something similar to this from scratch, here is a breakdown of how you can make a compelling, welcoming email that is short, friendly, and tailored to SaaS onboarding.
How to Write and Structure a B2B SaaS Welcome Email
In addition to the quick tips we outline, follow this guide to create your own ‘welcome email’ template.
1. Subject Line: Keep it Clear and Friendly
The subject line should grab attention and make the recipient feel welcome. For example:
- “Welcome to [Your SaaS Name] – Let’s Get Started!”
- “You’re In! Here’s What’s Next at [Your SaaS Name]”
2. Opening Line: Show Excitement and Personalize
Start with a friendly tone that makes the user feel valued.
Example:
“Hi [First Name],
We’re thrilled to have you onboard! Welcome to [Your SaaS Name], where we help [specific value your product delivers].”
3. Briefly Reinforce the Value
In 1–2 sentences, remind them of the main benefit they’ll get from using your platform.
Example:
“With [Your SaaS Name], you’ll simplify [problem they face] and unlock [specific benefit, like time savings or better analytics]. Our goal is to help you [achieve a clear outcome].”
4. Provide a Call-to-Action (CTA)
Guide them toward taking their first step with your product. Make the CTA action-oriented and simple.
Example:
“Let’s get you set up! Start by [link to onboarding, demo, or account setup]. It only takes a few minutes.”
5. Offer Support
Show them you’re available if they have questions.
Example:
“Have any questions? Our team is here to help. Just reply to this email or check out our [link to help center].”
6. Closing: Keep it Warm and Human
End on a friendly note that encourages connection.
Example:
“Here’s to your success!
[Your Name]
[Your Title or Team Name]
[Your SaaS Name]”
2. Product Setup Email
This is where you help users actually do something useful.
A product setup email helps new users get started with your product by providing clear, step-by-step instructions or links to resources like tutorials or onboarding guides, fostering better user engagement.
Its purpose is to remove any friction users might face during setup and ensure they can quickly experience the product’s value.
For B2B businesses, this email can boost user confidence and engagement by demonstrating your commitment to their success.
A well-designed setup email sets the foundation for long-term retention by making the onboarding process smooth and stress-free.
WHAT WORKS:
- Step-by-step screenshots
- Estimated setup time (be honest)
- Checklist format
- One main action to complete
Here’s an example from Postmark.
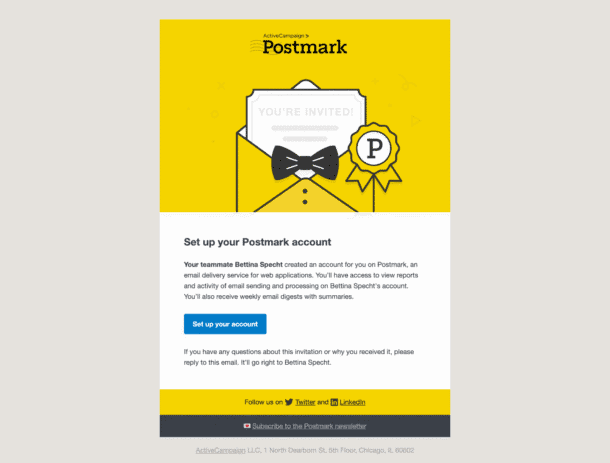
This product setup email is brief but effective because it gives a summary of what the user can expect after setting up their account.
To make it easier for the user, Postmark added a button in the email to help direct users to the setup landing page.
If the next thing on your checklist is to send out a product setup email, save time by using this template below.
Subject Line: Get Started with AllSign in Just 10 Minutes
Hi Jeremy,
You’re one step away from making contract management seamless with AllSign! Setting up your account is simple, and we’re here to guide you through every step.
Why complete your setup?
With AllSign, you’ll:
Automate workflows and save time.
Stay organized with a clear contract overview.
Never miss a deadline with automated reminders.
What to expect during setup:
Time Required: About 10 minutes.
Steps:Connect your key tools (e.g., email or cloud storage).
Customize your contract workflows.
Upload your first contract and get started!
Resources Available: Quick guides, videos, and live support.
Ready to get started?
👉 [Start Your Setup Now]
Need help? Reply to this email or visit our Help Center. We’re here to make your onboarding smooth and stress-free!
Let’s get you set up for success,
[Your Name]
The AllSign Team
If you want to write your own product setup from scratch, here’s a quick guide on how you can design your own.
How to Write and Structure a Product Setup Email
Follow these guidelines below in addition to what we outlined above regarding what works when writing product setup emails to come up with an effective and value-driven email guide for your users.
1. Subject Line: Be Clear and Actionable
Your subject line should immediately tell users what they’ll achieve by opening the email.
Examples:
- “Set Up [Your SaaS Name] in Just [X Minutes]!”
- “Your [SaaS Name] Setup Guide – Quick and Easy”
2. Opening Line: Be Friendly and Encouraging
Start by welcoming the user and setting a positive tone.
Example:
“Hi [First Name],
You’re almost ready to experience the full power of [Your SaaS Name]! Setting up is quick and easy—we’ll guide you every step of the way.”
3. Clearly State the Benefits of Completing Setup
Explain why completing the setup is important and what they’ll gain from it.
Example:
“Once you’re set up, you’ll be able to [specific benefit 1] and [specific benefit 2]. You’ll be up and running in no time!”
4. Detail What to Expect
Break down the process so users know exactly what they’ll need to do and how long it will take.
Example:
“Here’s what to expect during setup:
- Estimated Time: 10–15 minutes.
- Steps: You’ll connect your [tool/integration], configure your [feature], and start using [SaaS Name].
- Resources: You’ll have access to guides, videos, and our support team if you need help.”
5. Provide a Clear Call-to-Action (CTA)
Make it easy for users to start. Include a prominent button or link to the setup page.
Example:
“Ready to get started? Click below to begin your setup:
👉 [Start Setup Now]”
6. Offer Help and Reassurance
Encourage users to reach out if they need support, emphasizing your availability.
Example:
“If you have any questions, don’t hesitate to reply to this email or visit our Help Center. We’re here to make this process as smooth as possible!”
7. Closing: Be Friendly and Positive
Reinforce that you’re excited to see them succeed with your product.
Example:
“Let’s get you set up and on your way to success!
[Your Name]
[Your Title or Team Name]
[Your SaaS Name]”
3. Activation Email
An activation email is designed to encourage user adoption by prompting users to take a key action that unlocks the value of a product or service.
For B2B businesses, this could mean completing account setup, using a core feature, or trying out a specific tool.
The purpose is to move users closer to becoming fully engaged and seeing the product’s benefits firsthand.
By guiding them through this step, activation emails help build momentum, reduce drop-offs, and create a stronger connection between the user and the platform, boosting long-term retention.
Time to get users hooked on that first win.
QUICK TIPS:
- Focus on ONE key feature
- Show the end result first (“Create a professional invoice in 30 seconds”)
- Include a progress bar
- Add social proof (“Join 5,000 others who sent their first invoice today”)
Grammarly sends a simple “Check your first document” email with a big green button.
They know that once you see those red underlines, you’re probably gonna stick around.
For users who have disabled the app for browsers, Grammarly uses a different version of an activation email.
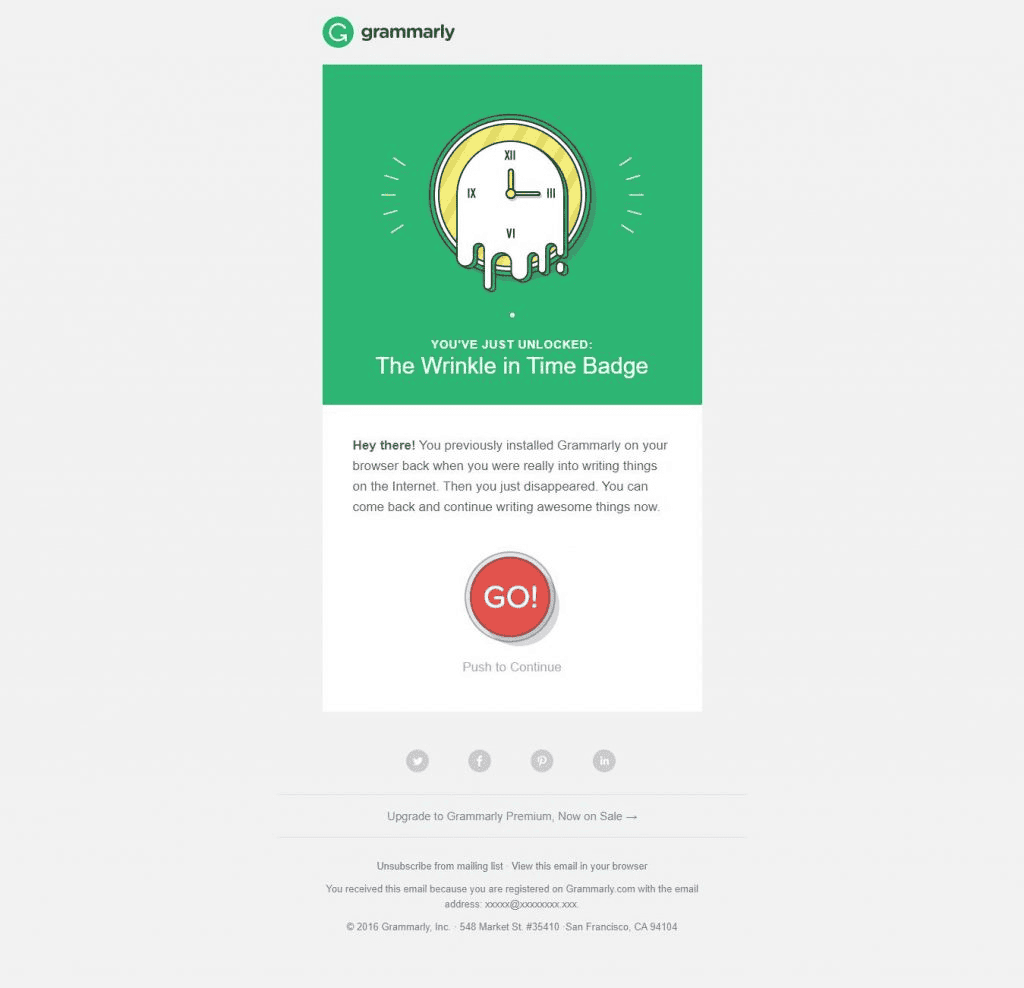
This time, it comes with a gentle reminder of what the user once was able to do with the app, accompanied by a big red button to help them get back on track.
It’s not about the button, however; the content is still whats important.
Just like in this template that you can use for your next activation email.
Subject Line: Automate Your Contracts in Minutes with AllSign
Hi Jeremy,
Imagine never missing a deadline and cutting contract turnaround times by 50%. With AllSign’s Automated Reminders, that’s exactly what you can achieve.
This feature ensures your contracts move forward on time by automatically notifying the right people when action is needed. Say goodbye to bottlenecks and stay on top of every deal effortlessly.
What our customers are saying:
“Using AllSign’s reminders, we’ve reduced follow-up emails by 70%. It’s a total game-changer for our workflow!” – [Client/Company Name]
Ready to experience it for yourself?
👉 [Activate Automated Reminders Now]
Need help setting it up? Reply to this email or check out our Help Center. We’re here to make it easy!
Let’s get you closer to your goals,
[Your Name]
The AllSign Team
Remember that the goal of an activation email is to help users achieve quick wins; this helps ignite their excitement toward achieving greater objectives with your SaaS.
Adding social proofs can help ignite their excitement even more.
Here’s how you can do that.
How to Write and Structure an Activation Email
In addition to featuring end results and social proofs in your activation email, here are other important points not to miss when writing an activation email.
1. Subject Line: Highlight the Outcome or Value
Focus on the result the user can achieve by activating the feature.
Examples:
- “See Your Results in Action with [Feature Name]!”
- “Boost Efficiency Today with [Feature Name]”
2. Opening Line: Capture Attention with the End Result
Start by describing the benefit or result the feature delivers. Make it tangible and specific.
Example:
“Hi [First Name],
What if you could cut contract turnaround time by 50%? With [Feature Name], you can! This powerful tool lets you [key outcome, e.g., automate approvals, streamline workflows, etc.].”
3. Highlight the Feature and Its Key Benefit
Explain what the feature does and how it directly helps the user. Keep it brief and focused.
Example:
“[Feature Name] makes managing contracts faster and easier by [specific action, e.g., auto-sending reminders or creating templates]. This means fewer delays, better organization, and more time to focus on what matters most.”
4. Add Social Proof
Include a short testimonial or statistic to build trust and show the feature’s impact.
Example:
“Don’t just take our word for it—[User/Company Name] reduced approval times by 60% with this feature:
‘[Short testimonial quote, e.g., AllSign transformed how we manage contracts. The automation is a game-changer!]’”
5. Provide a Clear Call-to-Action (CTA)
Encourage users to activate the feature immediately.
Example:
“Ready to experience the difference?
👉 [Activate [Feature Name] Now]”
6. Offer Help or Reassurance
Show that help is available if needed, reducing friction.
Example:
“Need assistance? Our team is here to help. Just reply to this email or visit our Help Center.”
7. Closing: Keep It Encouraging and Friendly
End with a positive note to motivate the user to act.
Example:
“Let’s get you set up for success,
[Your Name]
The [Your SaaS Name] Team”
4. Feature Introduction Email
A feature introduction email highlights a new or existing product feature to educate and excite users.
For B2B businesses, it’s a way to showcase how their key feature solve a specific problem or enhances their experience.
These emails often include clear benefits, actionable use cases, and sometimes a demo or guide.
The purpose is to re-engage users, encourage adoption of the feature, and demonstrate ongoing value from your platform.
A well-crafted feature introduction email can deepen customer loyalty and boost long-term retention by keeping users invested in your product.
The key term to remember here is “feature” and not “features,” so don’t dump everything in one email at once.
Space it out.
KEY POINTS:
- One feature per email
- Show the problem it solves
- Include a real use case
- Add a quick tutorial link
Here’s one example of how Airtable did their feature emails when launching the “record templates” feature to their users
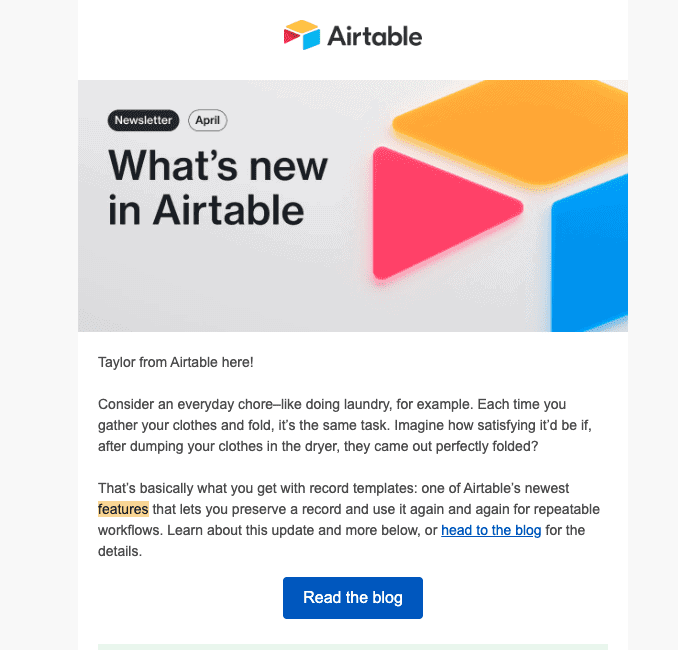
Notice the big banner that says, “What’s new in Airtable.”
It totally catches your attention and effectively signals to readers what the content is going to be about.
Since the feature email is about an Airtable feature, of course, they attached a button that brings readers to another resource that most likely discusses the feature in greater detail.
If you’re about to write your next feature introduction email, try using this template.
Subject Line: Meet Your New Workflow Hero: Smart Contract Templates
Hi Jeremy,
Transform how you create contracts.
With Smart Contract Templates in AllSign, you’ll save time, reduce errors, and streamline your workflows like never before.
Imagine this:
Instead of recreating contracts from scratch or hunting for old versions, you can now build, store, and reuse customized templates. In just a few clicks, you’ll have error-free, professional contracts ready to go.
Here’s how Smart Contract Templates can help you:
• Save hours every week by reusing pre-made templates.
• Ensure accuracy with pre-filled fields and standardized language.
• Stay organized by keeping all templates in one easy-to-access library.
What others are saying:
“AllSign’s Smart Templates have cut our contract creation time in half. It’s a game-changer for our sales team!” – Jordan L., Operations Manager
Ready to see it in action?
👉 [Create Your First Smart Template Now]
Need a hand? Our support team is here to help. Just reply to this email or visit our Help Center.
This is just the beginning of how AllSign can simplify your contract management. We can’t wait to see what you’ll achieve!
Cheers,
[Your Name]
The AllSign Team
Since you’re only focusing on one feature, you have the space and freedom to go into more detail about how that feature can help your users achieve desired results.
Of course, you must tailor this to whatever feature you want to highlight in your email.
How to Write and Structure a Feature Introduction Email
In addition to the keypoints made above, here are the important steps to drafting a feature introduction email that will make users love your highlighted feature.
1. Subject Line: Create Curiosity or Excitement
Make the subject line irresistible by highlighting the feature’s impact or creating curiosity.
Examples:
- “Your Workflow Just Got Smarter with [Feature Name]”
- “Introducing [Feature Name]: Your New Secret Weapon”
2. Hero Section: Grab Attention with the End Result
Start the email with a bold headline and subtext focused on the ultimate benefit.
Example:
Headline: “Transform the Way You Manage Contracts”
Subtext: “Our new [Feature Name] helps you save time, reduce errors, and close deals faster.”
Pair this with an eye-catching image, gif, or short animation that visually demonstrates the feature.
3. Paint the Vision: Show What’s Possible with This Feature
Use a relatable scenario to show how the feature solves a problem or simplifies a task.
Example:
“Imagine spending less time chasing signatures and more time closing deals. With [Feature Name], you can automatically send reminders, track approvals, and keep every contract on schedule—all in one place.”
4. Feature Highlights: What It Does and Why It Matters
List 2–3 specific ways the feature delivers value. Be direct and benefit-focused.
Example:
“Here’s what [Feature Name] can do for you:
- Automate follow-ups so you never miss a deadline.
- Track every contract stage with real-time updates.
- Save hours each week with streamlined workflows.”
5. Add Social Proof with a Visual Element
Incorporate a testimonial, a compelling stat, or a mini-case study. Pair it with an image or logo of the client (if applicable).
Example:
“[Client Name] reduced their contract cycle by 40% using [Feature Name]:
‘[Feature Name] has completely streamlined our process. It’s a must-have tool for busy teams.’”
6. Provide a Clear, Low-Friction Call-to-Action (CTA)
Make the next step obvious and easy. Add urgency or incentive if possible.
Example:
“Ready to simplify your workflow?
👉 [Try [Feature Name] Today – It’s Free to Start]”
7. Remove Barriers: Offer Help and Guidance
Anticipate any hesitation by offering easy access to support or resources.
Example:
“Not sure where to start? Check out our quick guide or contact us directly—we’re here to help.”
Include a link to the feature’s walkthrough, a video demo, or a help article.
8. Closing Line: Keep It Inspiring and Open
End with a positive, encouraging note that makes the reader feel empowered.
Example:
“This is just the beginning of what [Feature Name] can do for you. We can’t wait to see how it transforms your workflow!”
5. Progress-Tracking Email
A progress-tracking email shows users how far they’ve come in using your product or achieving their goals.
It highlights milestones, completed actions, or usage stats to reinforce their progress and motivate continued engagement.
For B2B businesses, this type of email serves as a positive reminder of the value your product delivers and encourages users to explore additional features or complete their onboarding.
By celebrating successes, progress-tracking emails build confidence, deepen satisfaction, and strengthen user adoption during the SaaS onboarding journey, improving long-term retention and loyalty.
This email is like a pat on the back, and everyone loves a good pat on the back.
QUICK TIPS:
- Celebrate specific numbers (“You’ve saved 3 hours this week!”)
- Compare to when they started
- Add next milestone to reach
- Include a shareable win
Use this template below to make sure your next progress-tracking email is the kind that encourages your user and boosts their confidence to achieve more with your SaaS.
Subject Line: You’re Crushing It, Jeremy! 50 Contracts Signed 🎉
Hi Jeremy,
Congratulations—you’ve hit an exciting milestone with AllSign! Since you started, you’ve:
• 50 contracts signed with ease.
• 15 hours saved using automated workflows.
• Zero missed deadlines thanks to real-time tracking.
You’re making amazing progress, and we’re so proud to be part of your journey!
Next Milestone: 100 Contracts Signed 🚀
You’re just 50 contracts away from hitting your next big achievement. Keep up the great work and streamline even more with our Smart Templates feature.
👉 [Explore Smart Templates Now]
Share Your Success
Celebrate your progress with your team or network! Click below to share a custom post:
👉 [Share Your Milestone]
We’re cheering you on to the next big win, Jeremy. Let’s keep the momentum going!
Cheers,
[Your Name]
The AllSign Team
To create your own progress-tracking email, use this guide below to ensure effectiveness.
How to Write and Structure a Progress-Tracking Email
Just like what the quick tips above outline, comparing the before and after of how your users have used your product helps them see their progress.
Don’t forget to leverage this element as you create your own from scratch with this guide:
1. Subject Line: Celebrate Milestones or Progress
Use the subject line to immediately highlight the user’s achievement.
Examples:
- “You’re Crushing It, [First Name]! 🚀”
- “Look How Far You’ve Come with [Your SaaS Name]!”
2. Opening Line: Acknowledge the User’s Achievement
Start by congratulating the user on their progress and make it personal.
Example:
“Hi [First Name],
You’ve made incredible progress! Since you started with [Your SaaS Name], you’ve achieved [specific result, e.g., sent 50 contracts or saved 20 hours of work]. Great job!”
3. Highlight Specific Numbers or Achievements
Show concrete data or key milestones the user has reached. Use visuals like a progress bar, chart, or badge to make the email visually engaging.
Example:
“Here’s what you’ve accomplished so far:
- 50 contracts signed in just 2 months
- 20 hours saved using automated reminders
- Zero missed deadlines thanks to real-time tracking
You’re on fire, Jeremy!”
4. Introduce the Next Milestone
Motivate the user to keep going by setting a clear next step.
Example:
“You’re just 10 contracts away from reaching 100 signed agreements!
Take the next step and streamline your workflows even further by exploring [feature/tool].”
5. Make It Shareable
Encourage users to share their progress on social media or internally. Provide a simple way to do so.
Example:
“Proud of your progress? Share your success with your team or network! Click below to create a custom post:
👉 [Share My Success]”
6. Provide a Call-to-Action (CTA) for the Next Step
Guide them toward an action that helps achieve the next milestone or explore a new feature.
Example:
“Keep the momentum going!
👉 [Track More Contracts Now]”
7. Closing: End with Encouragement
Reinforce positivity and excitement about their success.
Example:
“We’re so proud to be part of your journey, Jeremy. Let’s keep achieving great things together!”
Cheers,
[Your Name]
The [Your SaaS Name] Team
6. Re-Engagement Email
A re-engagement email is designed to reconnect with inactive users or customers who haven’t interacted with your product or service for a while.
Its purpose is to reignite interest by addressing their needs, highlighting new features, or offering incentives like discounts or exclusive content.
For B2B businesses, re-engagement emails serve as a proactive way to reduce churn, remind users of your value, and encourage them to take action.
By showing you care and providing a clear reason to return, these emails can revive interest and boost customer retention.
That’s why when users ghost you, don’t get desperate – get smart.
WHAT WORKS:
- Mention what’s new since their last visit
- Show what they’re missing
- Add social proof
- Include a comeback offer
Speaking of getting smart, Crafty’s way of re-engaging users right here is one example note learning from.
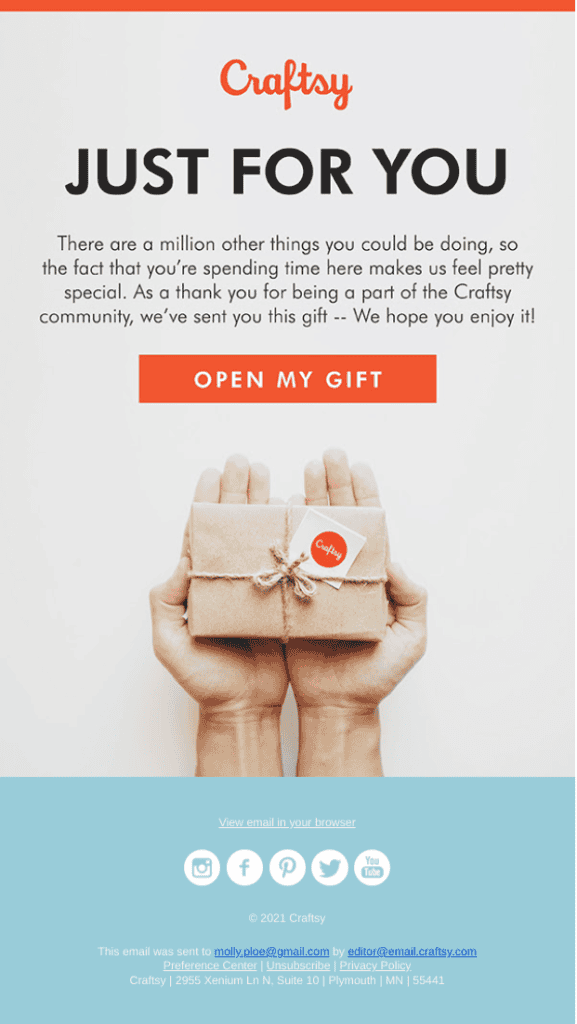
This example is nothing new, but it’s not the go-to take for most brands when re-engaging users who have lost momentum with them.
Crafty scrapped the common tactic of saying, “We missed you!” or “Our community is not the same without you.”
Instead, they displayed a little generosity by re-engaging users with a simple gift.
You can also try this tactic with the template below.
Subject Line: We Miss You, Jeremy – Here’s What’s New at AllSign!
Hi Jeremy,
It’s been a while since we last saw you on AllSign, and we miss helping you simplify your contract management!
In the meantime, we’ve made some exciting updates to make AllSign even better for you:
• Smart Templates: Build and reuse professional contracts in minutes.
• Advanced Analytics: Track contract performance with real-time insights.
• New Integrations: Seamlessly connect with [Tool A] and [Tool B].
Exclusive Offer Just for You
To welcome you back, we’re offering 15% off your next subscription or an extra month free—but only for the next 7 days!
👉 [Reactivate My Account Now]
Have questions or need help? Just reply to this email or visit our Help Center.
We’re excited to have you back, Jeremy, and to help you streamline your contracts like never before. Let’s get started!
Cheers,
[Your Name]
The AllSign Team
Since this is a re-engagement email, it is critical for your users to find something in your email that encourages them to engage—that’s why we included a comeback offer in the template above.
Aside from leveraging comeback offers, consider testimonials, the visual appeal of your email design, and countdowns to create urgency.
Most importantly, tailor it to your target user’s aspirations and pain points.
How to Write and Structure a Re-Engagement Email
Review the points made in the ‘what works’ section above and use those tips with this guide when creating your re-engagement email.
1. Subject Line: Capture Attention with Curiosity or a Benefit
Your subject line should spark curiosity or offer a compelling reason to re-engage.
Examples:
- “We Miss You, [First Name] – Here’s What’s New”
- “Come Back to [Your SaaS Name] with an Exclusive Offer”
2. Opening Line: Acknowledge Their Inactivity
Start by showing that you’ve noticed their absence and care about their return.
Example:
“Hi [First Name],
It’s been a while since we last saw you on [Your SaaS Name], and we miss having you around! In the meantime, we’ve been busy improving your experience.”
3. Highlight What They’ve Missed
Mention key updates, features, or benefits they might have missed since their last interaction. Use bullet points for clarity.
Example:
“Here’s what’s new since your last visit:
- [Feature Name]: Automate [specific task] in seconds.
- New integrations: Connect with [tool/platform] seamlessly.
- [Improvement]: Enhanced [specific feature] for faster results.”
4. Add a Comeback Offer
Provide an exclusive incentive to encourage them to return. This could be a free trial extension, a discount, or access to premium features.
Example:
“As a special welcome back, we’re offering you 15% off your next subscription or an extra month free when you reactivate your account. But hurry—this offer is only available for the next 7 days!”
5. Include a Clear Call-to-Action (CTA)
Make it easy for the user to take the next step with a prominent CTA button.
Example:
“Don’t miss out on all the new features and this exclusive offer.
👉 [Reactivate My Account Now]”
6. Offer Support to Lower Friction
Address potential concerns by showing your willingness to help.
Example:
“Need help or have questions? Reply to this email or visit our Help Center. We’d love to get you back on track!”
7. Closing Line: Keep It Warm and Encouraging
End with an upbeat tone that emphasizes your excitement about their return.
Example:
“We’re excited to have you back and help you achieve your goals with [Your SaaS Name]. Let’s make great things happen!”
7. Upselling Email
An upselling email encourages existing customers to upgrade their current plan, purchase additional features, or move to a premium tier.
It’s designed to highlight how the user can gain more value by expanding their use of your product or service.
For B2B businesses, upselling emails focuses on solving specific pain points, demonstrating added benefits, and showcasing the return on investment.
These emails serve to deepen customer engagement, enhance satisfaction, and drive revenue by positioning your product as an even more essential tool for their business success.
In upselling emails, you can’t be shy about asking for the sale – you just have to time it right.
REMEMBER:
- Wait until after they’ve had some wins
- Show specific benefits of upgrading
- Include a time-limited offer
- Add testimonials from similar users
Now, this type of email is something we probably all have in our inboxes.
But this specific example from Zapier below is what we love. Why?
Take a look.
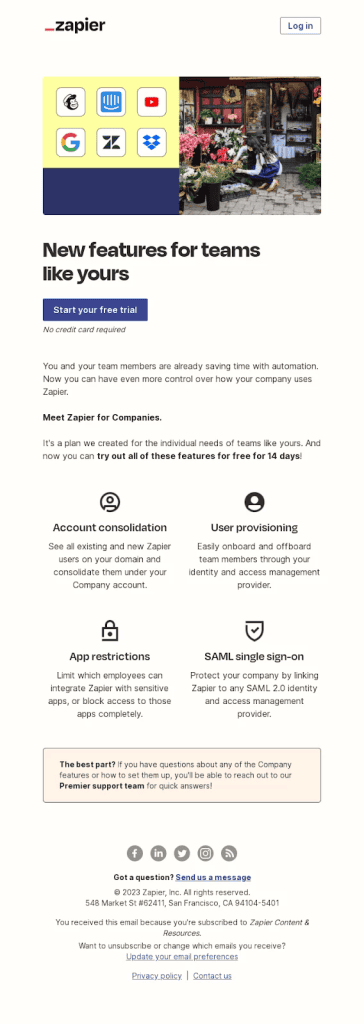
The upsell email reminds its users of what they’re already enjoying just by using their platform.
But Zapier heightens the excitement by helping them envision what else can be achieved with a higher plan through a quick breakdown of the plan’s high-tier features.
The best part? “No credit card required.”
If anything, that’s one quick way to lower your customers’ (especially trial users) guard against resisting an upsell; this way, they have less reason not to try and go with a free trial.
You can play around with Zapier’s approach using this template right below.
Subject Line: Jeremy, Unlock Advanced Contract Tools with AllSign Pro
Hi Jeremy,
Imagine managing contracts even faster, with zero bottlenecks, and gaining insights that drive smarter decisions. With AllSign Pro, you’ll get the advanced tools you need to supercharge your workflow and take contract management to the next level.
Here’s what AllSign Pro offers:
• Custom Workflows: Automate even the most complex approval chains.
• Advanced Analytics: Gain deeper insights into contract performance.
• Premium Support: Get priority assistance whenever you need it.
Special Offer Just for You
Upgrade to AllSign Pro by [specific date] and save 20% for the first 3 months. Don’t miss out on this exclusive opportunity to boost your efficiency and results!
What others are saying:
“AllSign Pro has been a game-changer for us. The custom workflows and analytics helped us cut processing time by 40% and make data-driven decisions effortlessly.” – Jordan L., Operations Manager
Ready to upgrade?
👉 [Upgrade to AllSign Pro Now]
Have questions or need advice? Reply to this email or visit our Help Center. We’re here to help!
Let’s take your contract management to the next level, Jeremy. We can’t wait to see the results you’ll achieve!
Cheers,
[Your Name]
The AllSign Team
To replicate this template and add your own touch, here’s a quick guide below.
How to Write and Structure an Upselling Email
It makes a difference to take note of the reminders set above. Just like waiting for the right time that your users have experienced a win, these quick tips in addition to this guide will help you write a compelling email that upsells.
1. Subject Line: Focus on the Benefit of Upgrading
Your subject line should highlight the key value or urgency of the offer.
Examples:
- “Unlock More Value with [Your SaaS Name] Pro”
- “Upgrade Today and Save [X%] – Limited Time!”
2. Opening Line: Grab Attention with a Compelling Hook
Start by focusing on how upgrading solves a pain point or unlocks a benefit.
Example:
“Hi [First Name],
Imagine saving even more time and achieving faster results with [Your SaaS Name]. With [Upgrade Plan Name], you’ll get all the tools you need to [specific benefit, e.g., automate complex tasks, gain deeper insights, or streamline your workflow].”
3. Outline Specific Benefits of Upgrading
Clearly detail what users gain by upgrading. Use bullet points for clarity and impact.
Example:
“With [Upgrade Plan Name], you’ll:
- Save more time: Automate [specific process] with advanced workflows.
- Improve accuracy: Access enhanced [feature, e.g., analytics or reporting tools].
- Collaborate better: Get [additional feature, e.g., multi-user access or integrations].”
4. Include a Time-Limited Offer
Create urgency with a clear deadline for the offer.
Example:
“Upgrade by [specific date] and enjoy 20% off your first 3 months. Don’t miss this opportunity to boost your productivity and save!”
5. Leverage Testimonials for Social Proof
Showcase a customer success story to reinforce the value of upgrading.
Example:
“Here’s what [Client Name] had to say about upgrading:
‘Moving to [Upgrade Plan Name] was a game-changer for our team. The advanced features helped us cut processing time in half and manage contracts seamlessly.’”
6. Add a Clear and Actionable CTA
Make the next step simple and enticing.
Example:
“Take advantage of this exclusive offer today:
👉 [Upgrade to Pro Now]”
7. Offer Reassurance and Support
Address potential concerns by showing your availability to help.
Example:
“Not sure if upgrading is right for you? Reply to this email or visit our Help Center to learn more. Our team is here to help!”
8. Closing: Motivate Action with a Friendly Tone
End on a positive note to encourage the user to act.
Example:
“Let’s take your experience with [Your SaaS Name] to the next level. We can’t wait to see the amazing things you’ll achieve!”
Cheers,
[Your Name]
The [Your SaaS Name] Team
Quick Tips for All These Emails
- Test your subject lines (seriously)
- Send from a real person’s email (not noreply@…)
- Keep it under 200 words
- Use buttons instead of text links
- Add alt text to images
- Test everything on mobile
Remember: timing beats perfection.
Better to send a decent email at the right time than a perfect email too late.
Up next, we’ll look at how to fit these emails into a complete onboarding strategy.
But for now, pick one email type you’re gonna fix this week.
Start there.
Comprehensive Email Onboarding Strategies Using Customer Value Journey
Want to know what makes an onboarding email really stick?
It’s all about nailing that “aha moment” – when your users first see real value in your product.
Let’s break down how to use the Customer Value Journey (CVJ) to create emails that actually work.
I’ve spent years testing this stuff, and here’s what gets results:
Starting with the Basics: The “Excite” Stage
This is where the magic happens.
Your job?
Get new users to that first win FAST.
For example, when Grammarly nudges new users to check their first document, they’re not just showing a feature – they’re creating a moment where users go, “Oh wow, this actually helps me.”
Here’s what works:
- Send welcome emails within 5 minutes of signup to keep new users engaged
- Include ONE clear action (not a list of 10 things to do)
- Show a 30-second video of their first task
- Follow up 24 hours later if they haven’t taken action
Making It Personal With Behavior Triggers
Trello does this really well.
They watch how people use their boards and send specific tips based on that.
So if someone’s creating lots of lists but not using labels, they’ll get an email about how labels can organize their work better.
Some trigger examples that work:
- User completes setup → Send “Here’s your next step” email
- User inactive for 3 days → Send “Need help?” email
- User hits milestone → Send celebration email
Real Examples That Get Results
Asana’s got this down to a science.
They don’t just dump all their features on you at once.
Instead, they:
- Start with basic task creation, helping new users navigate the platform effectively
- Introduce templates once you’ve made 3 tasks
- Show team collaboration features after you invite your first teammate
Quick Tips for Emails That Enhance User Engagement
- Write subject lines like you’re talking to a friend
- Keep emails under 200 words
- Use bullets instead of paragraphs
- Add one clear button (not three competing ones) to help trial users take the desired action effortlessly
- Test sending times (Tuesday at 10 AM often wins)
Tools That Make This Easier
- ActiveCampaign for behavior tracking
- HubSpot for email automation
- Intercom for real-time engagement
Remember: The goal isn’t to show everything your product can do for new SaaS users immediately.
It’s about getting users to that first “wow” moment as quickly as possible.
Then, build from there.
A/B testing shows that emails focusing on one small win get 23% more clicks than emails showcasing multiple features.
Start small, measure what works, and adjust based on your data.
The trick is matching your email sequence to where users are in their customer journey.
Don’t try to sell your premium plan before they’ve even used your basic features.
Build trust first, then escalate the relationship.
And here’s something most people miss: timing matters more than content.
The perfect email sent at the wrong time can hinder the effectiveness of your customer onboarding process.
Watch your users’ behavior patterns and time your emails accordingly.
But for now, focus on getting these basics right.
They’re what separate okay onboarding from great onboarding.
Key Takeaways
Well, here we are – you’ve made it through the whole guide!
Let’s wrap up what really matters for nailing your onboarding emails.
Understanding Your Users
First up, remember that your users aren’t just email addresses – they’re real people with specific needs.
The Customer Value Journey shows us that understanding these needs is crucial.
Use your customer avatar to craft emails that actually speak to your users’ problems.
Key Strategies for B2B SaaS Onboarding Emails That Increase Retention
Here’s what we learned works best:
Welcome Email
- Start with a killer welcome email that shows immediate value.
- Keep it short (nobody reads long emails anyway).
- Add ONE clear action step.
- Show what’s coming next.
Timing and Behavior
- Time your emails based on behavior.
- Don’t blast everyone with the same schedule.
- Watch what users do with your product.
- Send the right message when they need it most.
Creating “Aha Moments”
- Make those “aha moments” happen fast.
- Guide users to quick wins.
- Celebrate small victories.
- Show progress clearly.
Personalization
- Get personal (but not creepy).
- Use their name and company info.
- Reference their actions.
- Segment based on their needs.
Final Thoughts
Here’s what to do right now:
- Review your current onboarding emails.
- Map out your first week of messages.
- Pick ONE thing to test first.
Remember – good onboarding isn’t about fancy automation or perfect grammar.
It’s about helping real people get real value from your product.
Frequently Asked Questions
About the author
Brian helps B2B founders install marketing + automation engines powered by Co-Thinking with AI. With 15+ years building predictable revenue systems, he's worked with SaaS, agency, and service businesses on 90-day done-with-you growth accelerators.
Ready to install your predictable revenue engine?
Book a free strategic growth session. Walk away with a tailored 90-day blueprint and 3 quick wins you can use this week.